Table of content
Table of Contents
Introduction
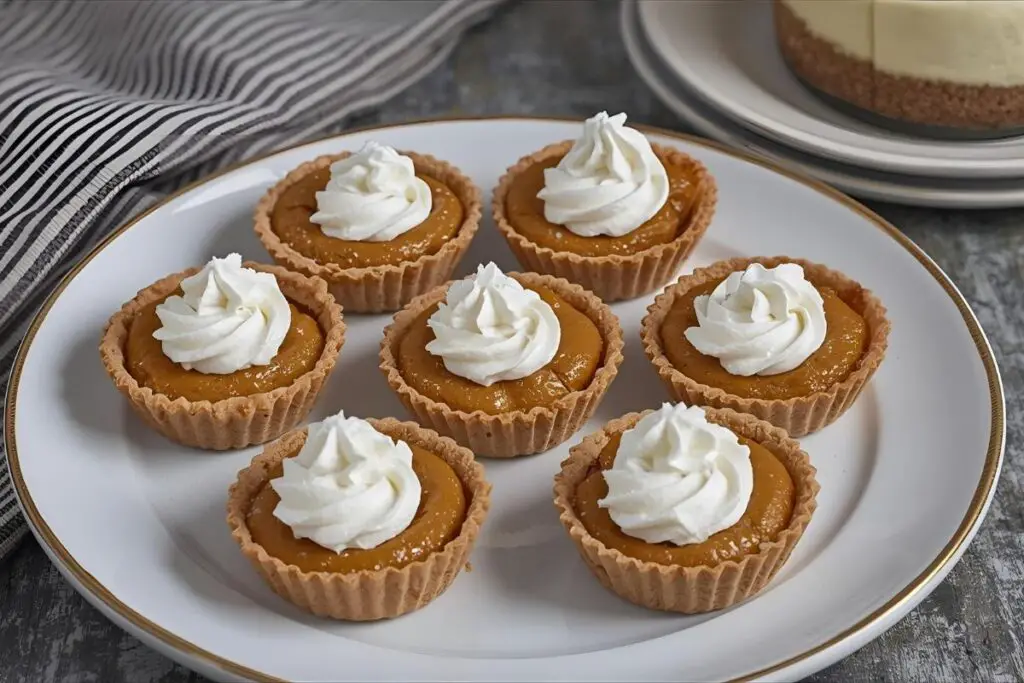
As the leaves turn vibrant shades of amber and the crisp breeze fills the air, our cravings naturally shift to warm, comforting flavors that epitomize fall. Among all the seasonal delights, mini pumpkin pies stand out as an irresistible treat that combines tradition, flavor, and the perfect size for sharing or savoring solo. These miniature versions of classic pumpkin pies pack all the deliciousness into bite-sized parcels, making them ideal for parties, holiday gatherings, or cozy nights at home.
Mini pumpkin pies strike a beautiful balance between simplicity and indulgence. Whether you’re a seasoned baker or a beginner venturing into fall desserts for the first time, these individual pies provide a perfect canvas for creativity and ease. The beauty of mini pumpkin pies lies in their convenience—they bake faster, look charmingly rustic, and give everyone a personalized serving without extra fuss. Plus, with the right ingredients and a few smart baking techniques, you can transform humble seasonal staples into masterpieces that impress every palate.
In this article, we’ll walk you through creating mini pumpkin pies in seven straightforward steps, sharing expert tips and variations to customize your dessert. From selecting the best pumpkin filling to mastering the flaky crust, this guide ensures your mini pumpkin pies will be a hit at any fall occasion. Ready to embrace the flavors of autumn and indulge in humble yet heavenly desserts? Let’s dive into the wonderful world of mini pumpkin pies!
Ingredients List
Creating the perfect mini pumpkin pies begins with choosing the right ingredients, each contributing to the texture, flavor, and overall success of these delightful treats. Here’s an expanded look at the essential components:
Pumpkin Puree (1 cup): Opt for pure canned pumpkin rather than pumpkin pie filling, which contains added spices and sugars. Pure pumpkin offers a neutral canvas allowing you to control flavor and sweetness. For a fresher option, you can roast and puree your own pumpkin, enhancing natural sweetness and vibrancy.
Pie Crust (1 package or homemade, enough for 12 mini pies): You can use store-bought pie dough for convenience or craft your own flaky crust with butter and cold water. Butter-based crusts provide excellent flavor and flakiness; shortening ensures tenderness. For gluten-free alternatives, there are ready-made gluten-free pie crusts or oat-based crusts.
Sugar (½ to ¾ cup): Granulated white sugar is standard, but you can substitute with brown sugar or coconut sugar for deeper caramel notes and hints of molasses, complementing the pumpkin’s earthy sweetness. Adjust the amount according to your preferred sweetness level.
Eggs (2 large): Eggs bind the filling together, providing structure and richness. They help the custard set during baking and contribute to that smooth, creamy texture essential to pumpkin pies.
Heavy Cream or Evaporated Milk (½ cup): Heavy cream adds richness and a velvety finish, while evaporated milk is a classic go-to for a lighter alternative that still promotes a creamy custard texture. For dairy-free versions, almond or coconut milk can be used, though they slightly alter the taste and texture.
Spices (1 teaspoon ground cinnamon, ½ teaspoon ground ginger, ¼ teaspoon ground nutmeg, ¼ teaspoon ground cloves, ¼ teaspoon salt): These traditional pumpkin pie spices infuse warmth and complexity. Freshly ground spices make a noticeable difference in aroma and flavor depth.
Vanilla Extract (1 teaspoon): Vanilla rounds out the spice blend, adding aromatic sweetness and balance.
Each ingredient serves a specific purpose, from texture enhancement to flavor layering. Choosing quality components ensures your mini pumpkin pies are flavorful, creamy, and have that moist yet firm custard consistency everyone loves.
Timing
Understanding the timing involved in making mini pumpkin pies is crucial for ensuring perfect results. Preparation typically takes about 15–20 minutes, including rolling dough and blending ingredients. Baking each pie requires approximately 20–25 minutes at 350°F (175°C), enough to set the custard without cracking or overbaking.
Total time, including cooling, is around 45 minutes to 1 hour, allowing pies to firm up for easier removal and ideal serving texture. Timing also affects the pie crust’s flakiness—too long in the oven risks burning the edges, while insufficient baking leaves the filling unstable.
If you plan to make mini pumpkin pies in batches, consider cooling each batch completely before storing or serving, as they reach their optimal flavor when fully chilled or at room temperature. This timing balance guarantees that your mini pies are both visually appealing and rich in fall flavors.
Step-by-Step Instructions
Print
Mini Pumpkin Pies 7 Easy Steps for Perfect Fall Desserts
- Total Time: 40 mins
- Yield: 12 mini pies
Description
These adorable mini pumpkin pies capture all the cozy flavors of fall in perfectly portioned bites. With a flaky crust, creamy spiced pumpkin filling, and endless topping options, they’re ideal for parties, holidays, or simply a comforting autumn treat at home.
Ingredients
- 1 cup pumpkin puree (not pumpkin pie filling)
- 1 package pie crust (or homemade, enough for 12 mini pies)
- ½–¾ cup sugar (white, brown, or coconut)
- 2 large eggs
- ½ cup heavy cream or evaporated milk (dairy-free alternatives work too)
- 1 tsp ground cinnamon
- ½ tsp ground ginger
- ¼ tsp ground nutmeg
- ¼ tsp ground cloves
- ¼ tsp salt
- 1 tsp vanilla extract
- Prep Time: 15 mins
- Cook Time: 25 mins
- Category: Weight Loss Meals
- Method: Baking
- Cuisine: American
Step 1: Prepare the Pie Crust
Begin by thawing your store-bought pie dough or preparing homemade dough. If making from scratch, mix cold butter with flour and a pinch of salt until pea-sized crumbs form, then add ice water gradually until the dough holds together. Chill the dough for about 30 minutes for better handling.
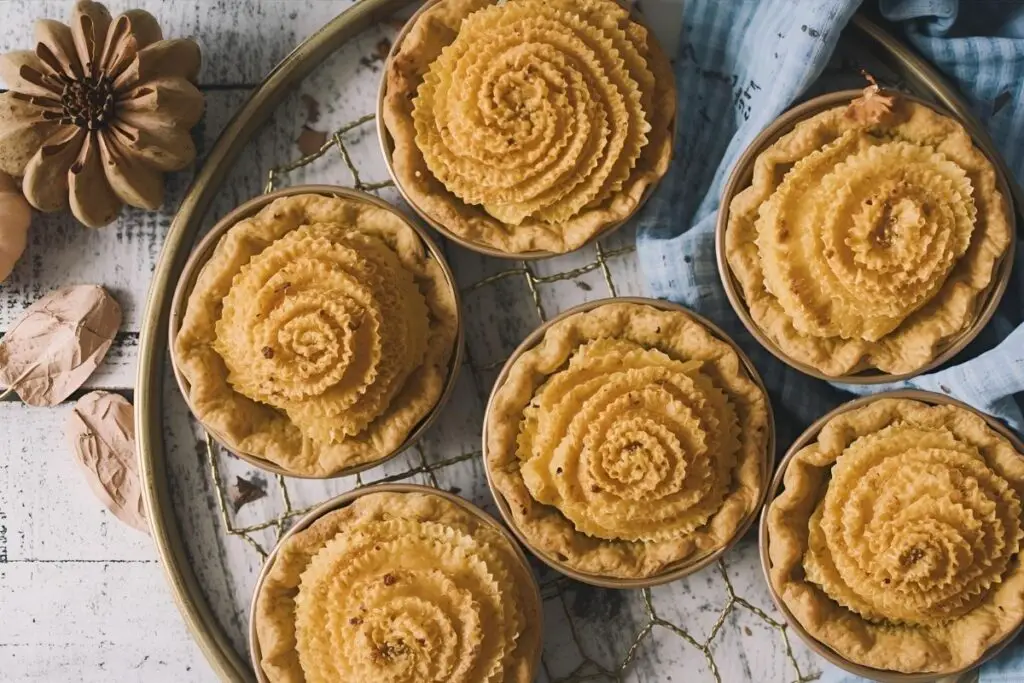
Roll out the dough to approximately ⅛-inch thickness and use a round cutter (about 3 inches in diameter) to cut out circles that fit your mini pie tins or muffin pans. Gently press each circle into the tins, ensuring there are no air bubbles and edges are smooth.
Pro Tip: Lightly flour your surface and rolling pin to prevent sticking, and avoid overworking the dough to keep it tender and flaky.
Step 2: Make the Pumpkin Filling
In a large mixing bowl, whisk together pumpkin puree, sugar, eggs, cream, and vanilla extract until smooth. Add spices and salt, blending thoroughly to create a uniform custard.
Taste your filling to adjust sweetness or spices if necessary. This is the moment to customize according to your preference—more cinnamon for warmth or extra ginger for a bit of zing.
Step 3: Fill and Arrange
Pour the pumpkin filling into each prepared pie crust, filling about ¾ full to leave room for the filling to expand slightly. Avoid overfilling to prevent spillage during baking.
For variation, try topping some pies with a sprinkle of crushed pecans or a swirl of caramel sauce before baking for added texture and flavor contrast.
Step 4: Bake with Care
Place the mini pie tins or muffin pans on the middle rack of a preheated oven at 350°F (175°C). Bake for 20–25 minutes, checking for a gentle jiggle in the center to confirm doneness. A toothpick inserted should come out clean or with minimal moisture.
To prevent crust from browning too quickly, especially on edges, cover the perimeter with foil halfway through baking.
Cooking Science Tip: The filling sets as eggs coagulate when heated. Avoid overbaking, which causes cracks and dryness.
Step 5: Cool, Serve, and Enjoy!
Once baked, remove mini pumpkin pies from the oven and allow them to cool completely in the pan. Cooling helps set the custard further, making the pies easier to remove and enhancing flavor development.
Carefully lift pies out using a small spatula or fingers, and serve as is or with traditional garnish like a dollop of whipped cream or a sprinkle of cinnamon.
For a festive presentation, plate mini pumpkin pies alongside spiced nuts, fresh apple slices, or a drizzle of maple syrup.
Serving Suggestions: Consider pairing these pies with a warm cup of spiced tea or pumpkin spice latte, amplifying fall vibes.
The beauty of mini pumpkin pies is their versatility; you can serve them warm immediately after cooling or chilled for a refreshing texture. Experiment with toppings like crushed gingersnaps, toasted coconut flakes, or cinnamon sugar dusting to elevate your dessert’s appeal.
Nutritional Information
Each mini pumpkin pie serving (about 1 pie) typically contains roughly 150–180 calories depending on the crust and filling variations. Here’s an approximate macronutrient breakdown per pie:
- Calories: 160
- Protein: 3 grams
- Fat: 8 grams (mostly from butter and cream)
- Carbohydrates: 18 grams (including sugars and fiber)
- Fiber: 2 grams
- Sugar: 10 grams
These numbers signify a moderate calorie dessert option, especially when you control sugar content and serving size.
Pumpkin is rich in antioxidants such as beta-carotene, which supports eye health and immune function. The spices included have anti-inflammatory properties and can aid digestion. Using real pumpkin puree rather than canned pie filling reduces additives and unnecessary sugars.
While mini pumpkin pies are indulgent treats, they offer nutrients from wholesome ingredients and can fit reasonably well into a balanced diet when portioned mindfully.
Healthier Alternatives for the Recipe
Looking to enjoy mini pumpkin pies with a healthier twist? Here are several creative alternatives:
Crust Swap: Use almond flour or oat flour crusts to reduce refined carbs and increase fiber or opt for a nut-based crust for added protein and healthy fats.
Sugar Reduction: Substitute refined sugar with maple syrup, honey, or stevia. Adjust amounts carefully as liquid sweeteners may affect pie texture.
Dairy-Free Filling: Swap heavy cream for coconut cream or unsweetened almond milk to make the pies suitable for lactose intolerance or vegan variations.
Add Protein: Incorporate protein powder or Greek yogurt into the filling for a nutrient boost and enhanced creaminess.
Spice it Up: Increase the amount of warming spices and reduce sugar, relying on cinnamon and nutmeg to impart sweetness and flavor instead of sugar.
These alternatives cater to various dietary preferences such as keto, paleo, vegan, or low-sugar diets, making mini pumpkin pies more inclusive and guilt-free.
Serving Suggestions
Mini pumpkin pies are naturally festive and versatile, making them great for a variety of serving styles and pairings:
Classic: Serve with freshly whipped cream or a scoop of vanilla bean ice cream.
Festive Flair: Top with candied pecans, toasted marshmallows, or a drizzle of caramel sauce for holiday elegance.
Beverage Pairings: Complement with warm spiced beverages such as mulled cider, chai tea, or pumpkin spice latte to enhance seasonal flavors.
Cultural Twists: Sprinkle with Mexican cinnamon and serve alongside horchata for a unique fusion experience, or add a maple syrup drizzle to embrace the Canadian fall harvest vibe.
Seasonal Pairings: Pair with roasted apples, pears, or cranberry compote for a holiday dessert platter rich in textures and tastes.
Because of their convenient size, mini pumpkin pies are ideal for potlucks, Thanksgiving dessert tables, or afternoon tea spreads, allowing guests to indulge without overcommitting to large slices.
Common Mistakes to Avoid
Even with a simple recipe, there are a few pitfalls to watch out for when baking mini pumpkin pies:
Overbaking: Leads to cracked crust and dry filling. Fix by checking pie after 18 minutes and removing when the center is just set but slightly jiggly.
Soggy Crust: Caused by not prebaking or underbaking crust. To prevent, consider blind baking crust for 5 minutes or line with foil and pie weights.
Too Much Filling: Overfilled pies can spill during baking. Fill tins only ¾ full for neat pies.
Uneven Thickness of Dough: Rolling dough unevenly causes some parts to bake faster. Use a rolling pin with thickness rings or eyeball evenness for consistent crust texture.
Not Letting Pies Cool: Serving directly out of the oven can cause fillings to be runny and messy. Allow cooling to let custard set fully.
Avoiding these common mistakes ensures beautifully baked mini pumpkin pies that are both tasty and visually appealing.
Storing Tips for the Recipe
Mini pumpkin pies keep well if stored properly. Allow pies to cool completely before covering to avoid sogginess from steam.
Refrigeration: Store in an airtight container or cover pans tightly with plastic wrap. They remain fresh for up to 4 days.
Freezing: For longer storage, wrap pies individually in plastic wrap and aluminum foil, and freeze for up to 2 months. Thaw overnight in the refrigerator before serving.
Meal Prep: Mini sizes make them perfect for making ahead of time for events. Store chilled and add fresh whipped cream or toppings right before serving.
When reheating, warm gently in a low oven to revive flaky crust without drying the custard.
Conclusion
Mini pumpkin pies are the quintessential fall dessert—sweet, spiced, and perfectly portioned for any occasion. Making them at home is surprisingly simple, especially with this 7-step guide optimizing every part of the process for delicious results. From selecting fresh pumpkin puree to mastering crust techniques and adding your own twists, these recipes promise both comfort and delight.
If you love the cozy flavors of fall, mini pumpkin pies are just the beginning of your seasonal baking journey. For even more autumn inspiration, you can explore Sally’s Baking Addiction’s Mini Pumpkin Pies for another take on bite-sized delights, or try pairing them with a warm batch of Bakery-Style Pumpkin Scones for the ultimate coffeehouse vibe at home. And if you’re in the mood for a more traditional dessert, you can’t go wrong with a classic Pumpkin Pie Recipe that brings comforting nostalgia to every table.
FAQs
Q1: Can I use fresh pumpkin instead of canned puree?
Yes! You can roast a sugar pumpkin, scoop out the flesh, and puree it yourself. It often has a fresher, slightly sweeter flavor but ensure it’s well-drained to avoid watery filling, which can affect texture.
Q2: How do I prevent the crust from getting soggy?
Blind bake the crust for about 5 minutes to firm it before filling. You can also brush it lightly with beaten egg white and bake another minute to create a moisture barrier.
Q3: Can mini pumpkin pies be frozen before or after baking?
Freezing after baking is best for maintaining texture. Wrap cooled pies individually and freeze. You can freeze raw, unbaked pies, but they require careful thawing and may affect crust flakiness.
Q4: What is the best way to reheat mini pumpkin pies?
Warm them gently in a 300°F (150°C) oven for 10–15 minutes. Avoid microwaving as it can make crust soggy and filling rubbery.
Q5: Can I make these pies vegan?
Yes, substitute eggs with flax eggs or applesauce and use coconut cream or a plant-based milk in place of dairy. Use vegan pie crust as well.
Q6: How long do mini pumpkin pies keep at room temperature?
Since the filling contains eggs and dairy, it’s safer to keep pies refrigerated after cooling and serve within 2 hours if left out.
Q7: Can I add other flavors like chocolate or nuts?
Absolutely! Mini pumpkin pies pair wonderfully with chocolate chips, streusel topping, or chopped nuts. Just add them before baking or as garnishes after.